Home » Archives for valevans » Page 3

Author: valevans

3D printing – parts three and four!

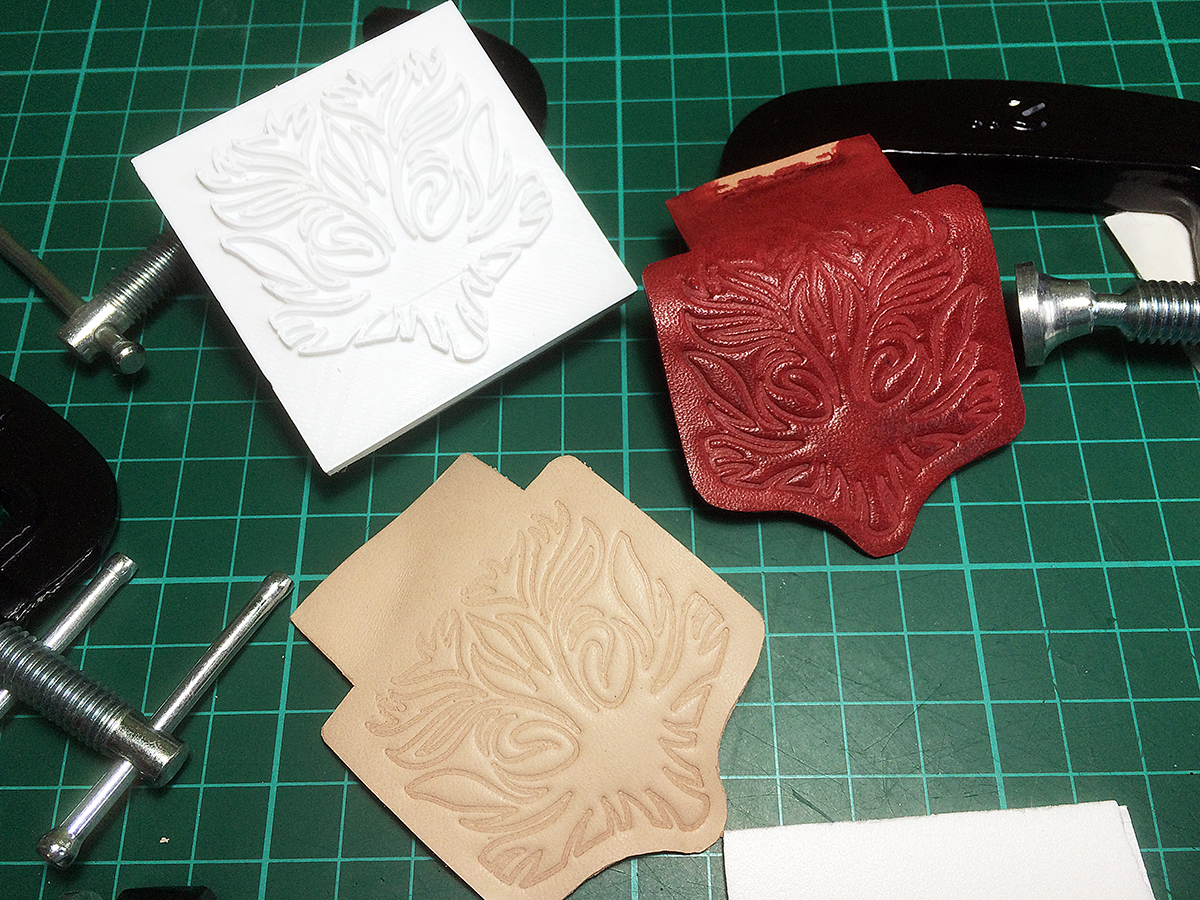
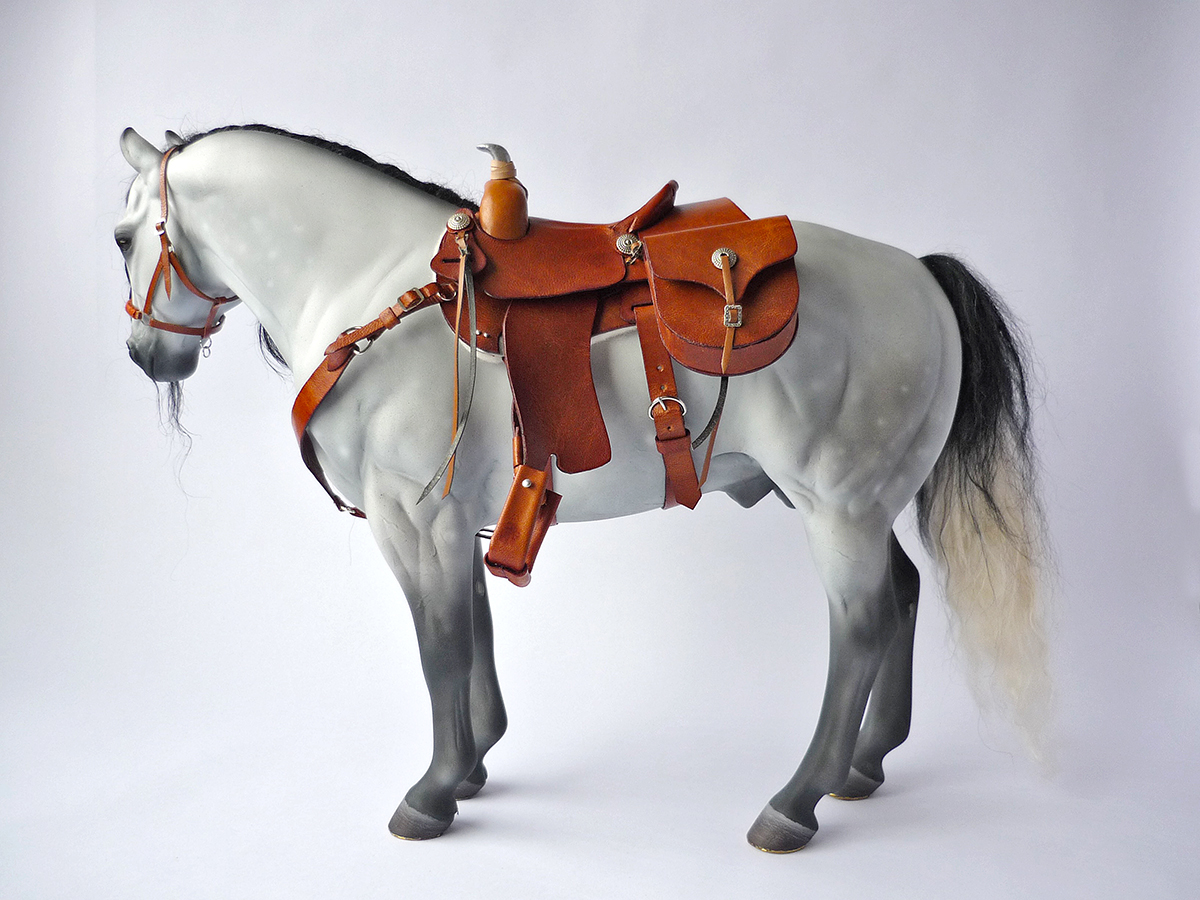
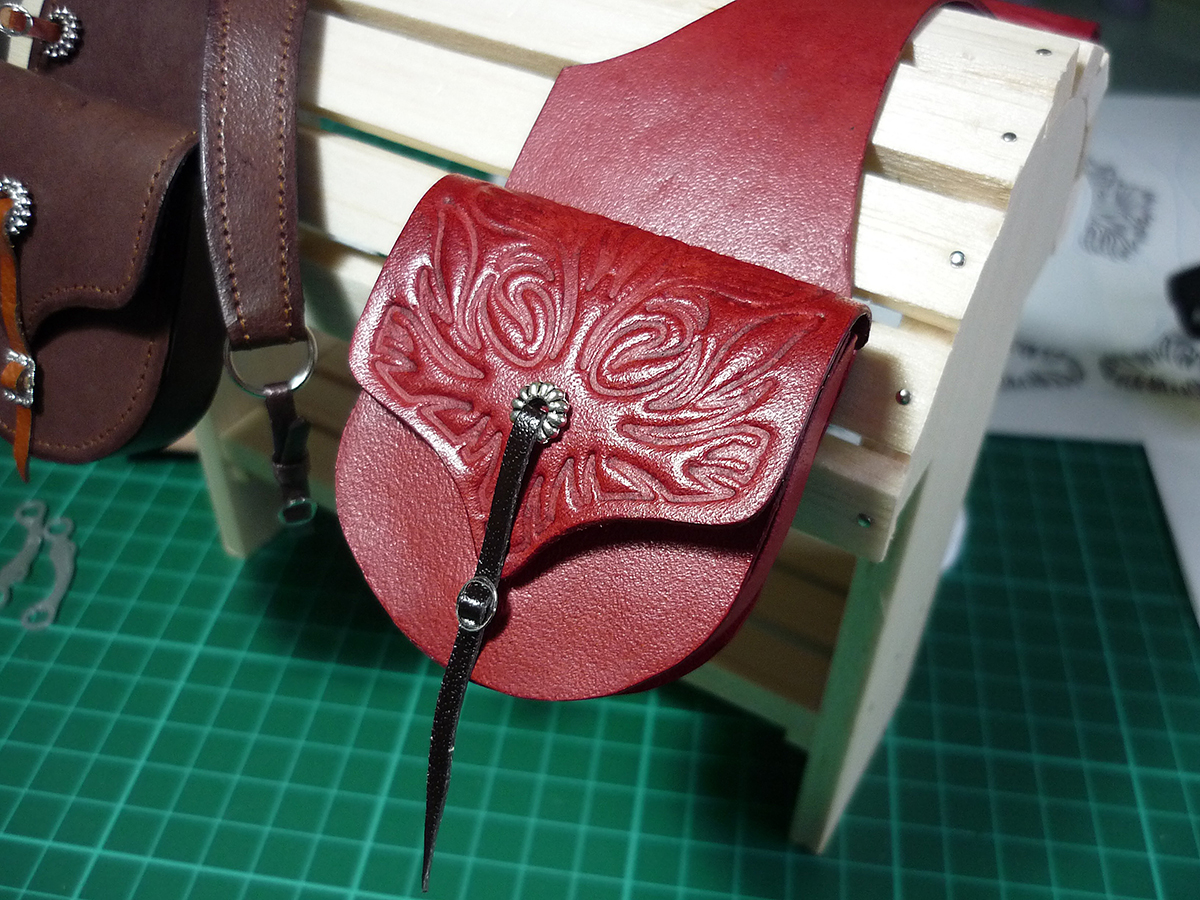
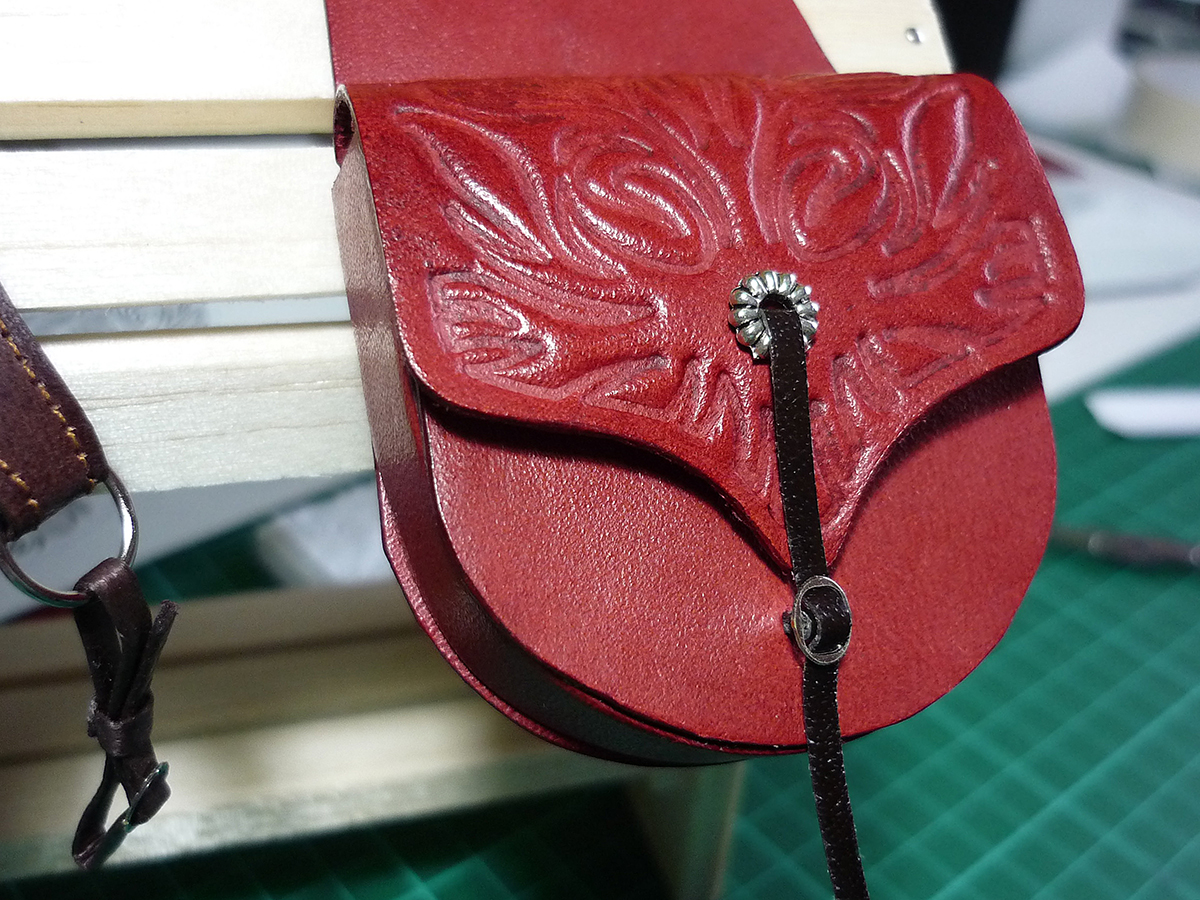
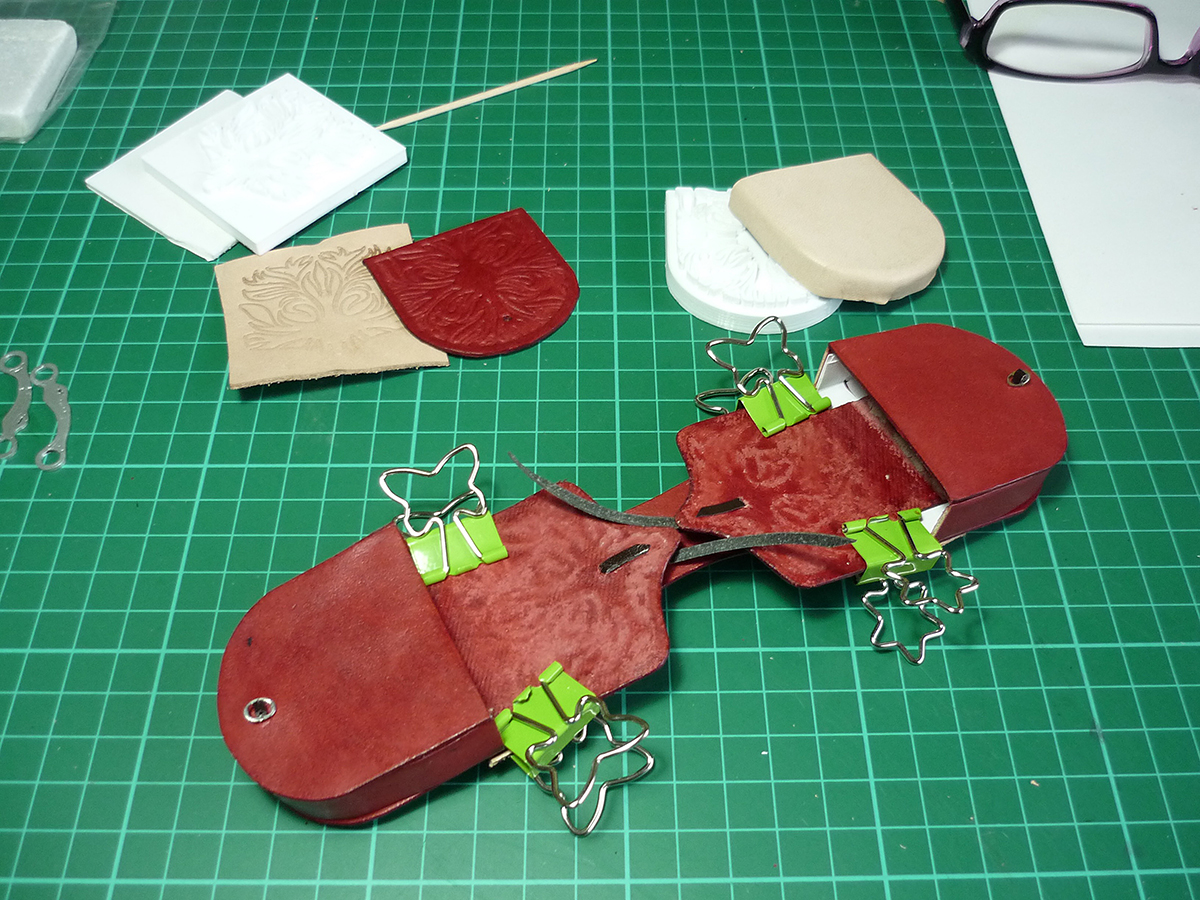
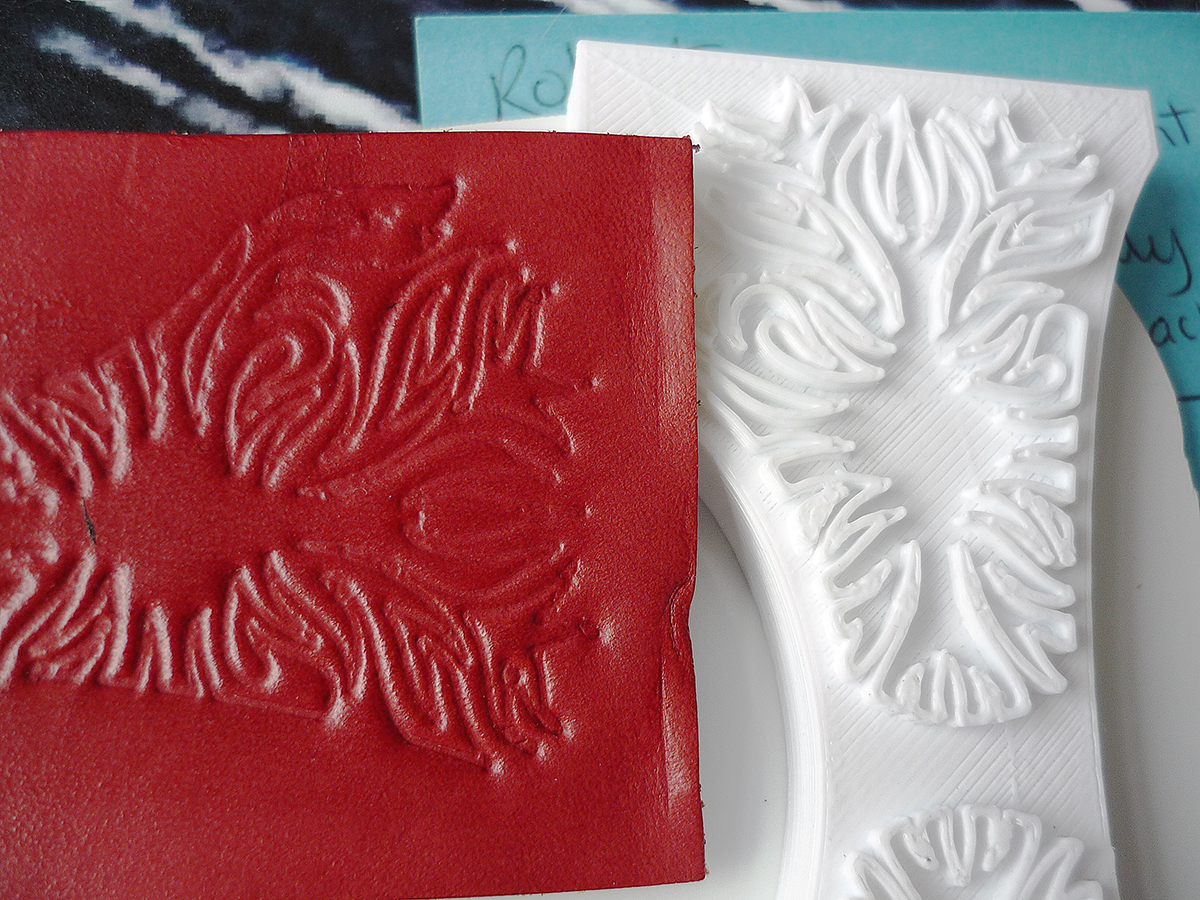
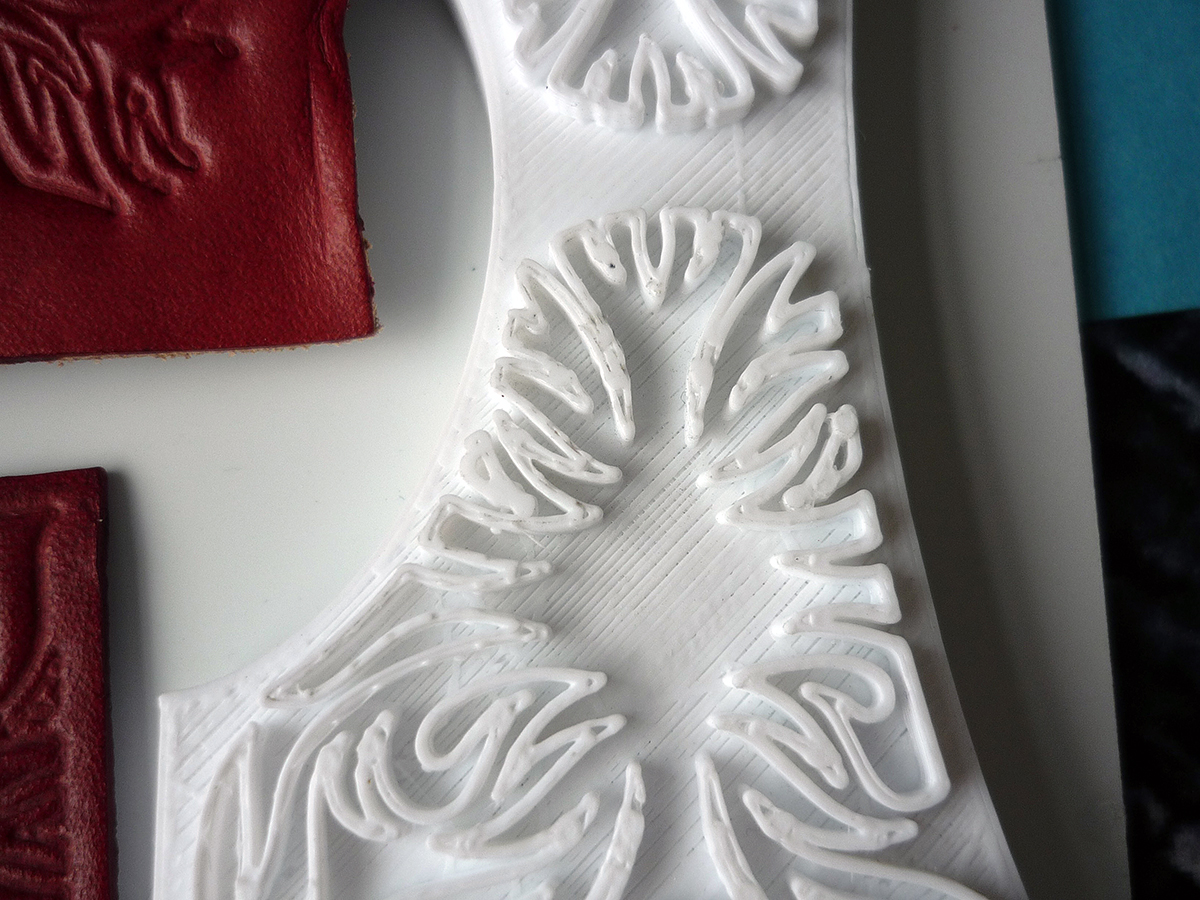
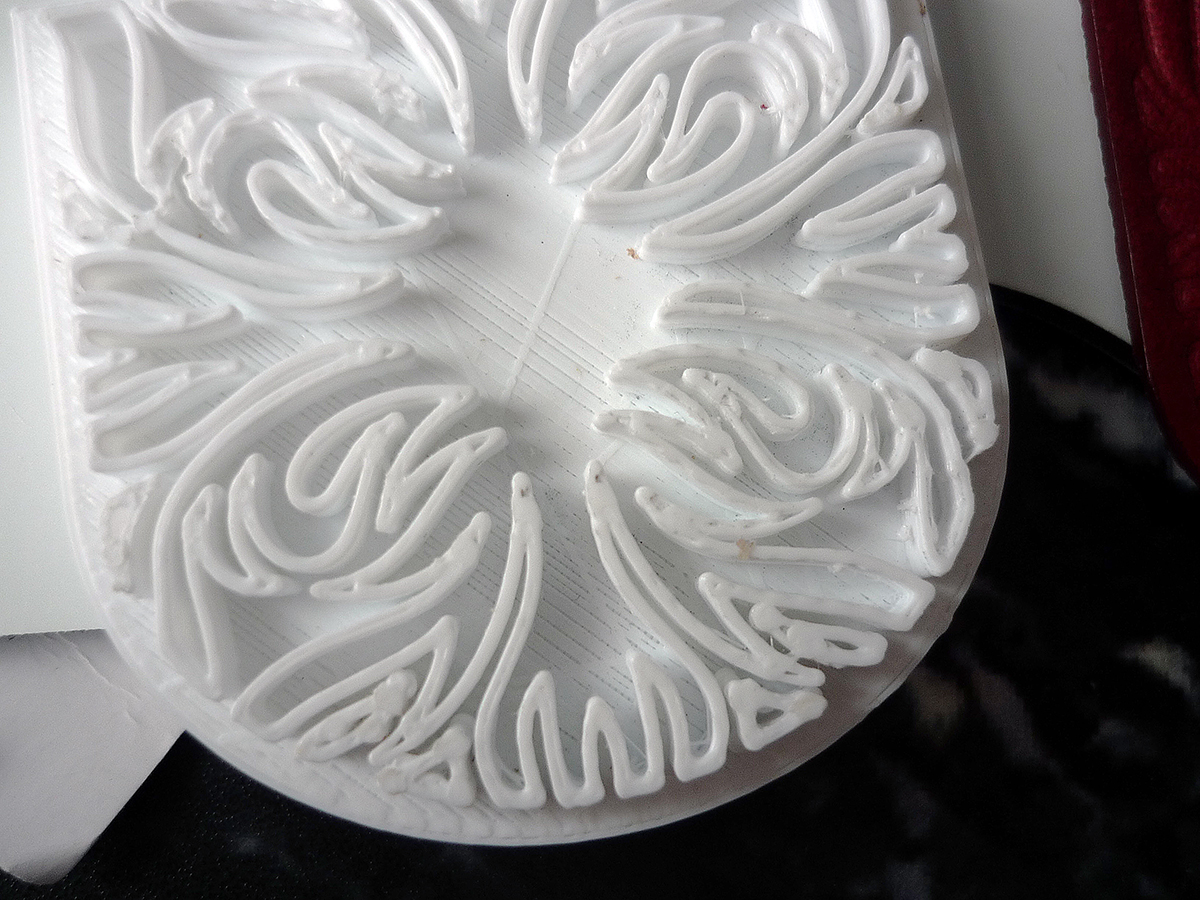
The new 3D stamps to compliment the saddle bag flap arrived last week. Sadly I had not taken into account the limitations of the printing process enough. After the success of that first flap, I made the next ones too detailed. So we had some spurs and blurring when I tested them out (I am very picky!) but it was a good learning process. Back to the drawing board and a full set of new files are out printing as we speak. But the saddle bag flap has stood up to repeated testing and use and I have completed a set of saddlebags in red showing what these 3D stamps can do.

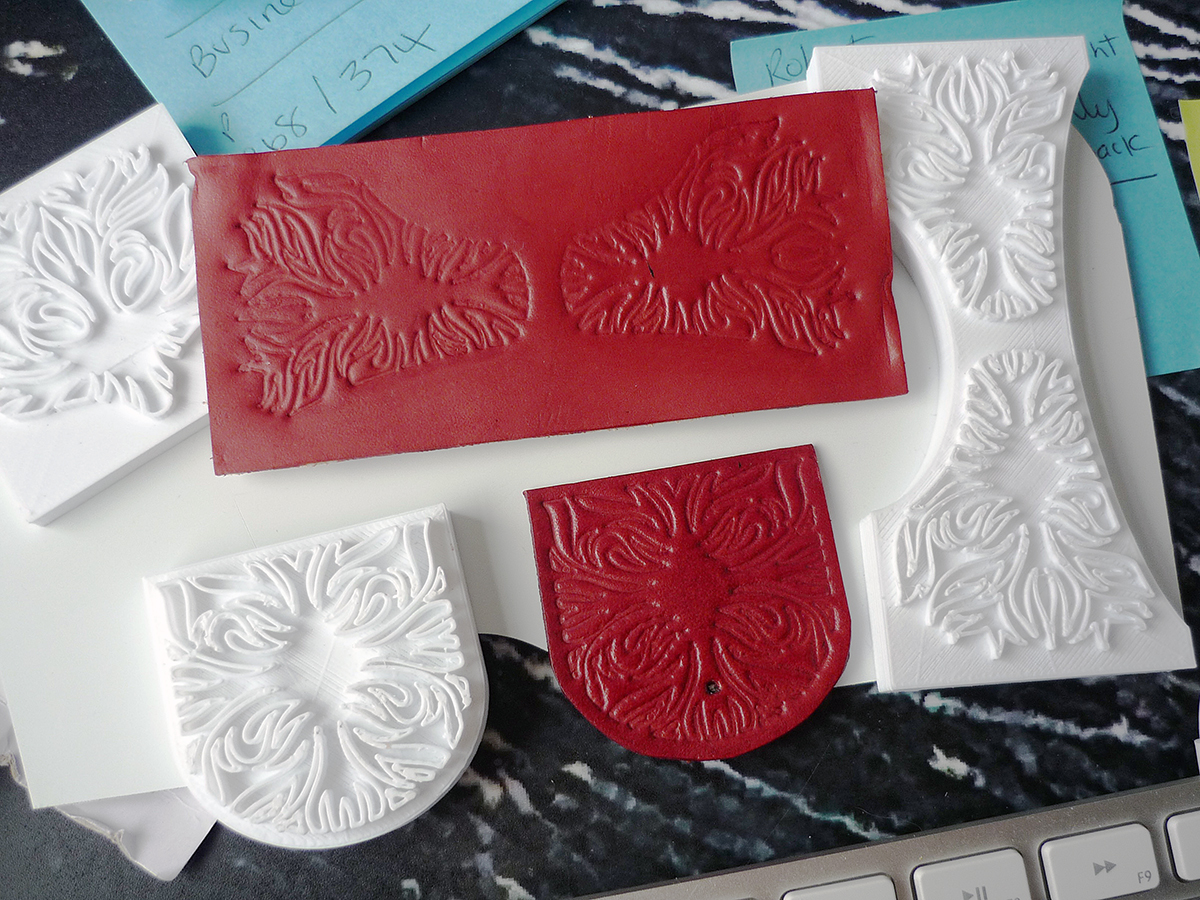
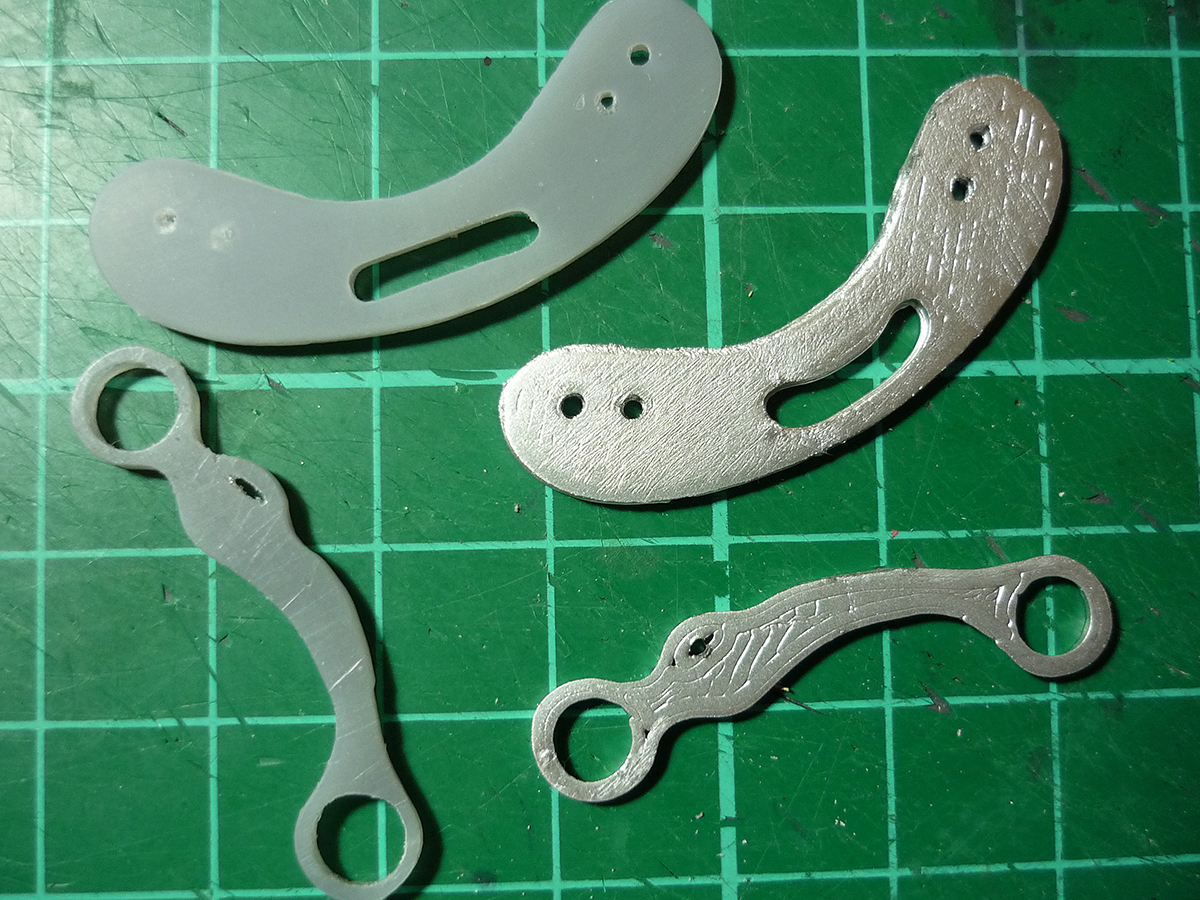
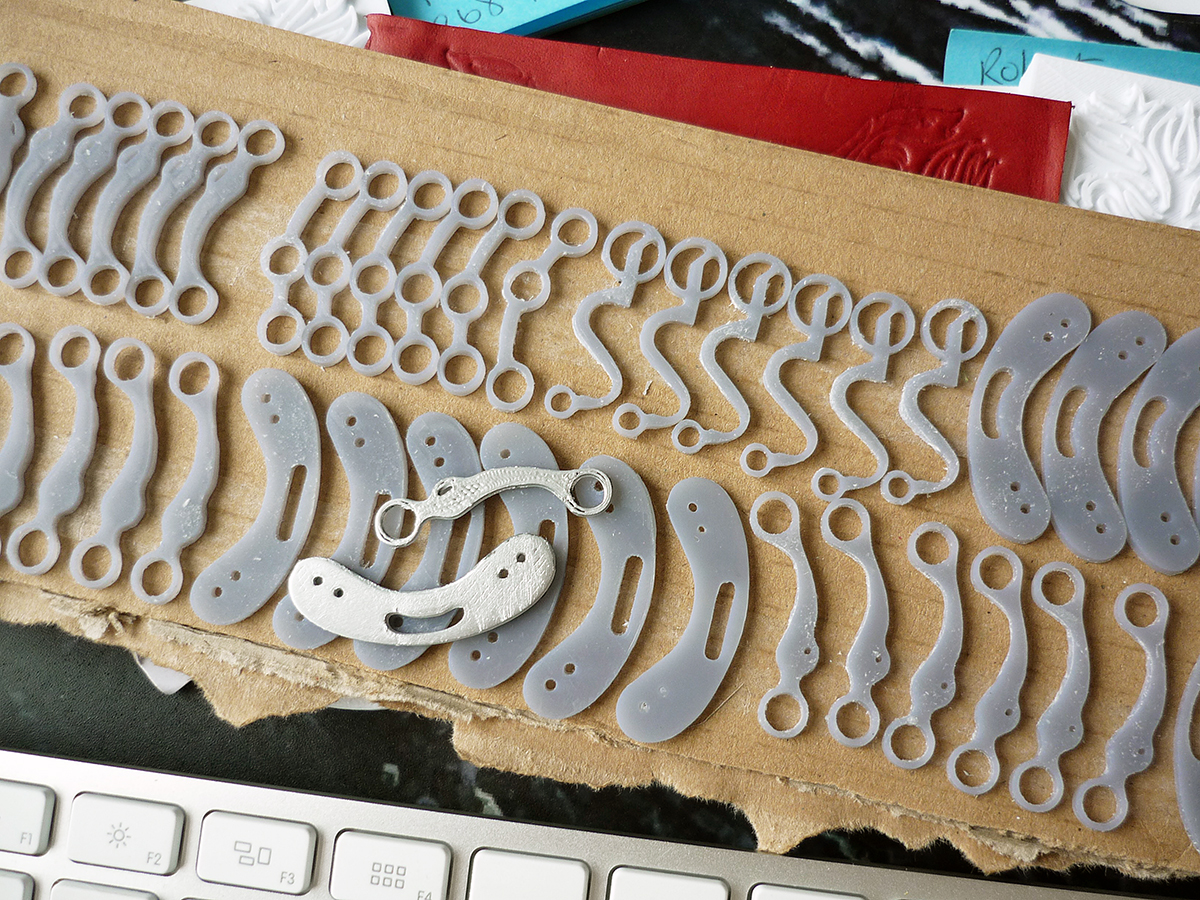
I also have tried a different method for producing small tack items, western bits and flat plates along with the stamps – this was more expensive and used resin material rather than plastic (PLA). Its produced a much smoother, finished product which is holding the shape really well. Hopefully lots less finishing and a better look!

I used TinkerCad to make the 3D models from an outline graphic – www.tinkercad.com

And Hubs to source a 3D printer close to me – www.hubs.com

More adventures in 3D printing

I did go on a leather carving course a couple months back, its a lovely thing to do, working with leather stamps is very satisfying. But it made me think about just how small the carving would need to be to look appropriate at 1/6 scale. So I decided to try another adventure in 3D – and I think it worked amazingly well.

Using my Adobe Illustrator software (again) and one of the handy patterns included I created a saddlebag flap illustration. Sounds easy? Not quite that easy, fiddly and involved some detailed adjustments. And after all that, on the advice of the printers, a little more fiddling! But the finished stamp has been working so well…

After lots of testing, (sourcing of g clamps) and generally trying out clamping and drying times etc, this is where I’m at. Because its worked so well I have ordered 2 more stamps to complement this one, for the saddlebag connecting strap and front of the bag. I hope to complete a full set of saddlebags very soon…

I used TinkerCad to make the 3D models from an outline graphic – www.tinkercad.com

And Hubs to source a 3D printer close to me – www.hubs.com

Another finished saddle, or two!

Took a quick holiday because the opportunity arose! But managed to get my latest saddle finished, a lovely chocolate brown number AND my Al Stohlman saddle too, so they have to be photographed for the website! Fortunately I have a great room which gets really good natural light. It does change day to day but Photoshop can usually help fix most things. I use a simple compact camera set on automatic and a Gorillapod for stability, a roll of white craft paper and Bob’s your uncle! So I took a few quick shots but need to take a better set now, watch this space. Then its on to the next one, if I can squeeze it in around the gardening of course.